Introduction
In the fall semester of my senior year at DigiPen, me and 4 others wanted to create a game based on Chao Garden from Sonic Adventure 2. If you are unfamiliar, a key part to the Chao Garden is feeding your pet and having them physically change shape and evolve dynamically. The details for Chao customization are surprisingly in depth so rather than trying to replicate all of what Chao Garden did, I simply wanted to explore how character customization could be implemented in general. What I came up with was surprisingly simple to implement.

Algorithm Concept
From the artists point of view, the method works by having a base model, and then creating a copy of that model and changing it for a specific feature. You can see this through the above gif; the base model is an icosphere, and each slider is a different feature-model that it can then interpolate between. This means that I have 6 different models in this case, all with identical vertex counts, vertex ordering, and index buffers. This brings up the major downside to this method: file size bloat. Even if the feature only changes a few vertices like the “horn” example, that feature still needs to share all of the vertex information of the base model meaning it has the same file size.
Implementation Details
As far as the implementation, its really easy. Each feature gets a scalar used for interpolation. To calculate the end result, each vertex begins at the base mesh position and goes through a summation with each feature-mesh. Each step of the summation is as follows: Vertex Position += (feature – base) * scalar, where feature is the position of the vertex in the current feature-mesh and base is the position of the current vertex in the base-mesh. It’s worth noting a weighted average doesn’t work since it would cause interpolation with all vertices and not just changed ones.
The function complexity of this is essentially the amount of feature models * vertex count of the model. This means if you are making a really in depth character customizer, you might want to budget the vertices a bit more. Alternatively the algorithm could be optimized by making feature-mesh files only store changes rather than the entire model. Since each vertex is calculated independently, there is potential for the algorithm to be parallelized in the case of slowdown from too many features being interpolated between.
Aside from vertex positions, the normals also have to be blended. I found that using the same summation with (featue – base) * scalar didn’t give good normals. What I ended up finding was replacing the (feature – base) difference with a lerp going from the base normal to the features normal with the same scalar as the lerp amount. The summation would then look something like Normal Sum += Lerp(base, feature, scalar) * scalar, where you renormalize the sum after looping through each feature. This might not be 100% correct values, but its a lot faster than recalculating normals from scratch after interpolating.
Most of the troubles I encountered while implementing this were actually on the side of Blender or Unity. Since the algorithm needs all the meshes to have the same vertex count and vertex ordering, optimizations when exporting from Blender or when importing into Unity can ruin this property. Luckily its pretty obvious when something is being optimized since the feature will have a different vertex count than the base model.
Visual Quality
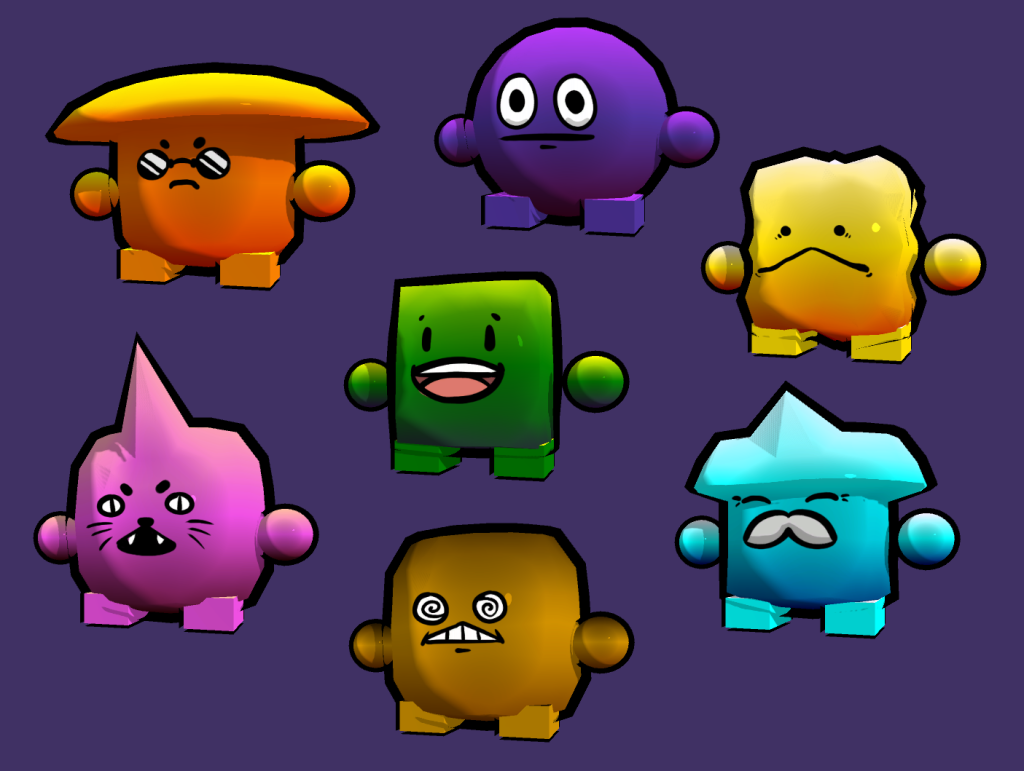
Overall, the quality of blending multiple features together is good. However, in the case of this project, the features change a lot of the vertices in the mesh causing lots of overlap to occur when interpolating multiple features. To demonstrate how horrific it can look, here’s what interpolating every feature together looks like:

Through this small experiment, I found that the more subtle a feature is, the more usable it is. This means that the method would work very well with human faces since features would be small changes such as a wider nose bridge, pointy ears, higher cheeks, sharper jawline, etc.
Conclusion
This method for interpolating meshes is very simple and convenient for both asset creation and programming. It also doesn’t have a huge cost on the overall project aside from potentially increasing load times and game size. The output can be pretty poor when working with abstract creatures, but if features are kept simple or customization is limited to the player, the output can remain reasonable and good looking.
After the fact, I discovered about Blender’s Blend Shapes, which is essentially this but better. It’s likely that the exported model is probably optimized to lower file size by only tracking changes. Additionally, Unity and Unreal both have means to import these blend shapes, so for any serious project it’s definitely the way to go.
